Admittedly, the storyboard isn’t as detailed as I would like it but this is because I accidentally misplaced the original. I chose the main images we wanted to use even though we never got chance to record all of them.
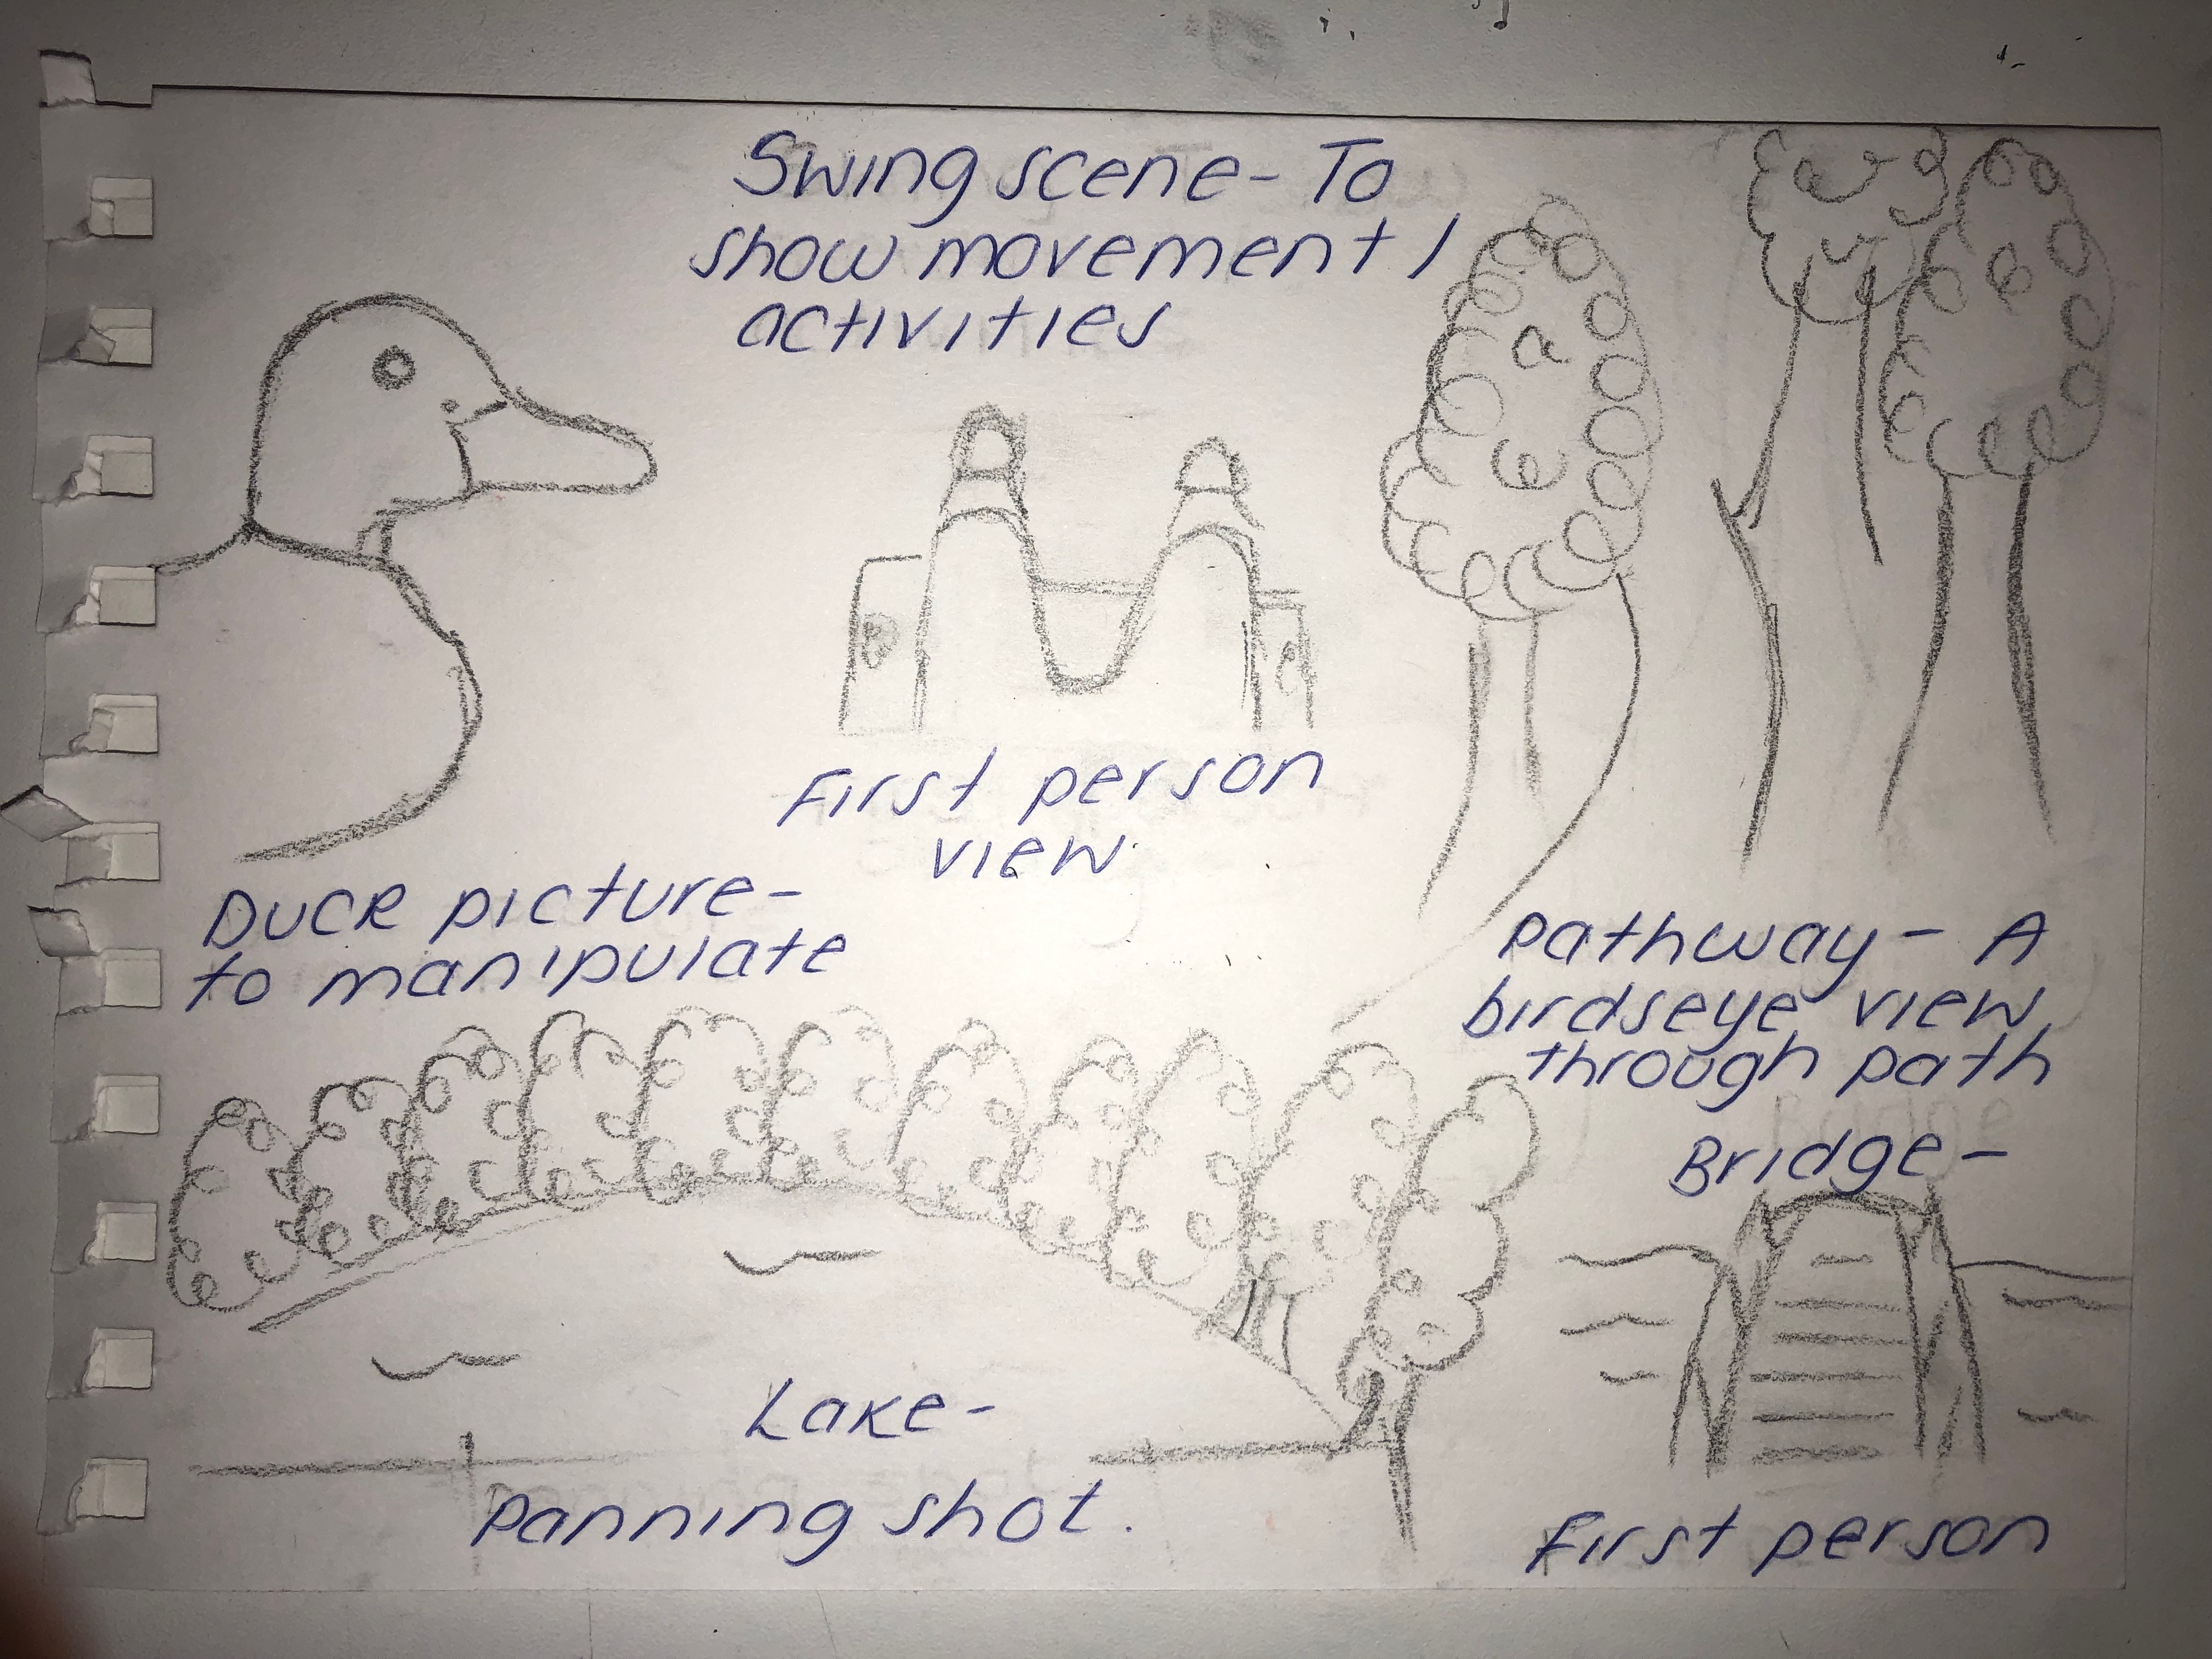
MY STORYBOARD
DUCK – I drew a picture of a duck because my plan was to possibly manipulate this with different colour tools on Photoshop. This would ideally be used for a poster which eventually I did end up using for my polygraph poster.
SWING – We needed a first person positioning for the camera, my idea was to make use of the park and record one of us swinging so just the bottom half of us was in view.
PATHWAY – We needed a panning shot, this was going to be similar to that as we wanted to record us following the pathway. I imagined the footage to be following the pathway where we could then possibly fast forward and slow down some parts to make the advertisement less basic.
LAKE – This was going to be our panning shot, because there is only greenery in the park we wanted to make sure there was some water within the advertisement. This scene did end up being a big part of our advertisement and the manipulation of this was very successful
BRIDGE -We also wanted a bridge scene of us possibly walking over the bridge, unfortunately this wasn’t as easy as we thought due to the limited amount of time and not actually finding something to could class as a bridge as what we found was very small.
Overall our footage went along with our plan very well and I am very happy with how it turned out.
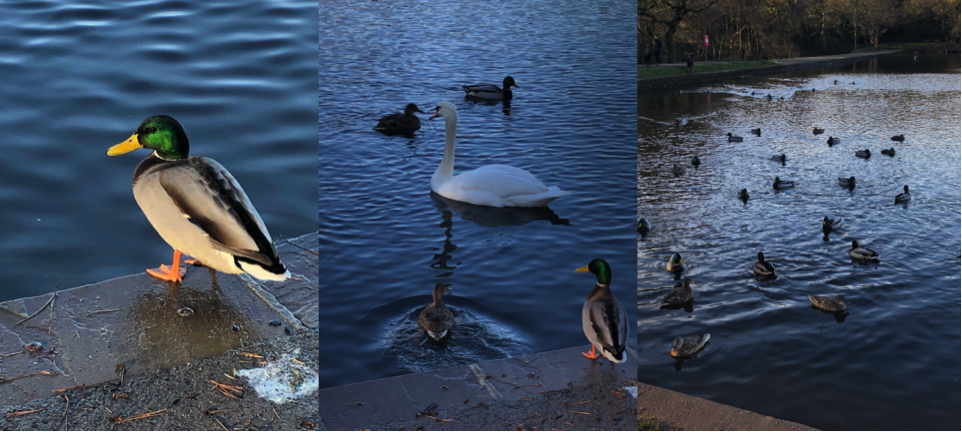
SUTTON COLDFIELD PARK
To be able to create our advertisement we needed footage to put into it. So my group went to Sutton Coldfield Park and recorded and took photos. We had to think thoroughly about what we were going to record so it fitted in with the space theme. This is the footage we took;
I created a sketch by brainstorming ideas for what my poster could be. I thought of different activities that you would do when on a regular holiday. I considered; swimming, flying, sunbathing etc, however a lot of these I had already noticed that were on the NASA space travel posters so I wanted to go for something I hadn’t come across on one of their posters.
I went for the regular ‘activity’ of pulling a suitcase. I went through the steps of a holiday on earth – Packing for the holiday, travelling, going through the airport, all the way up to getting to the hotel.
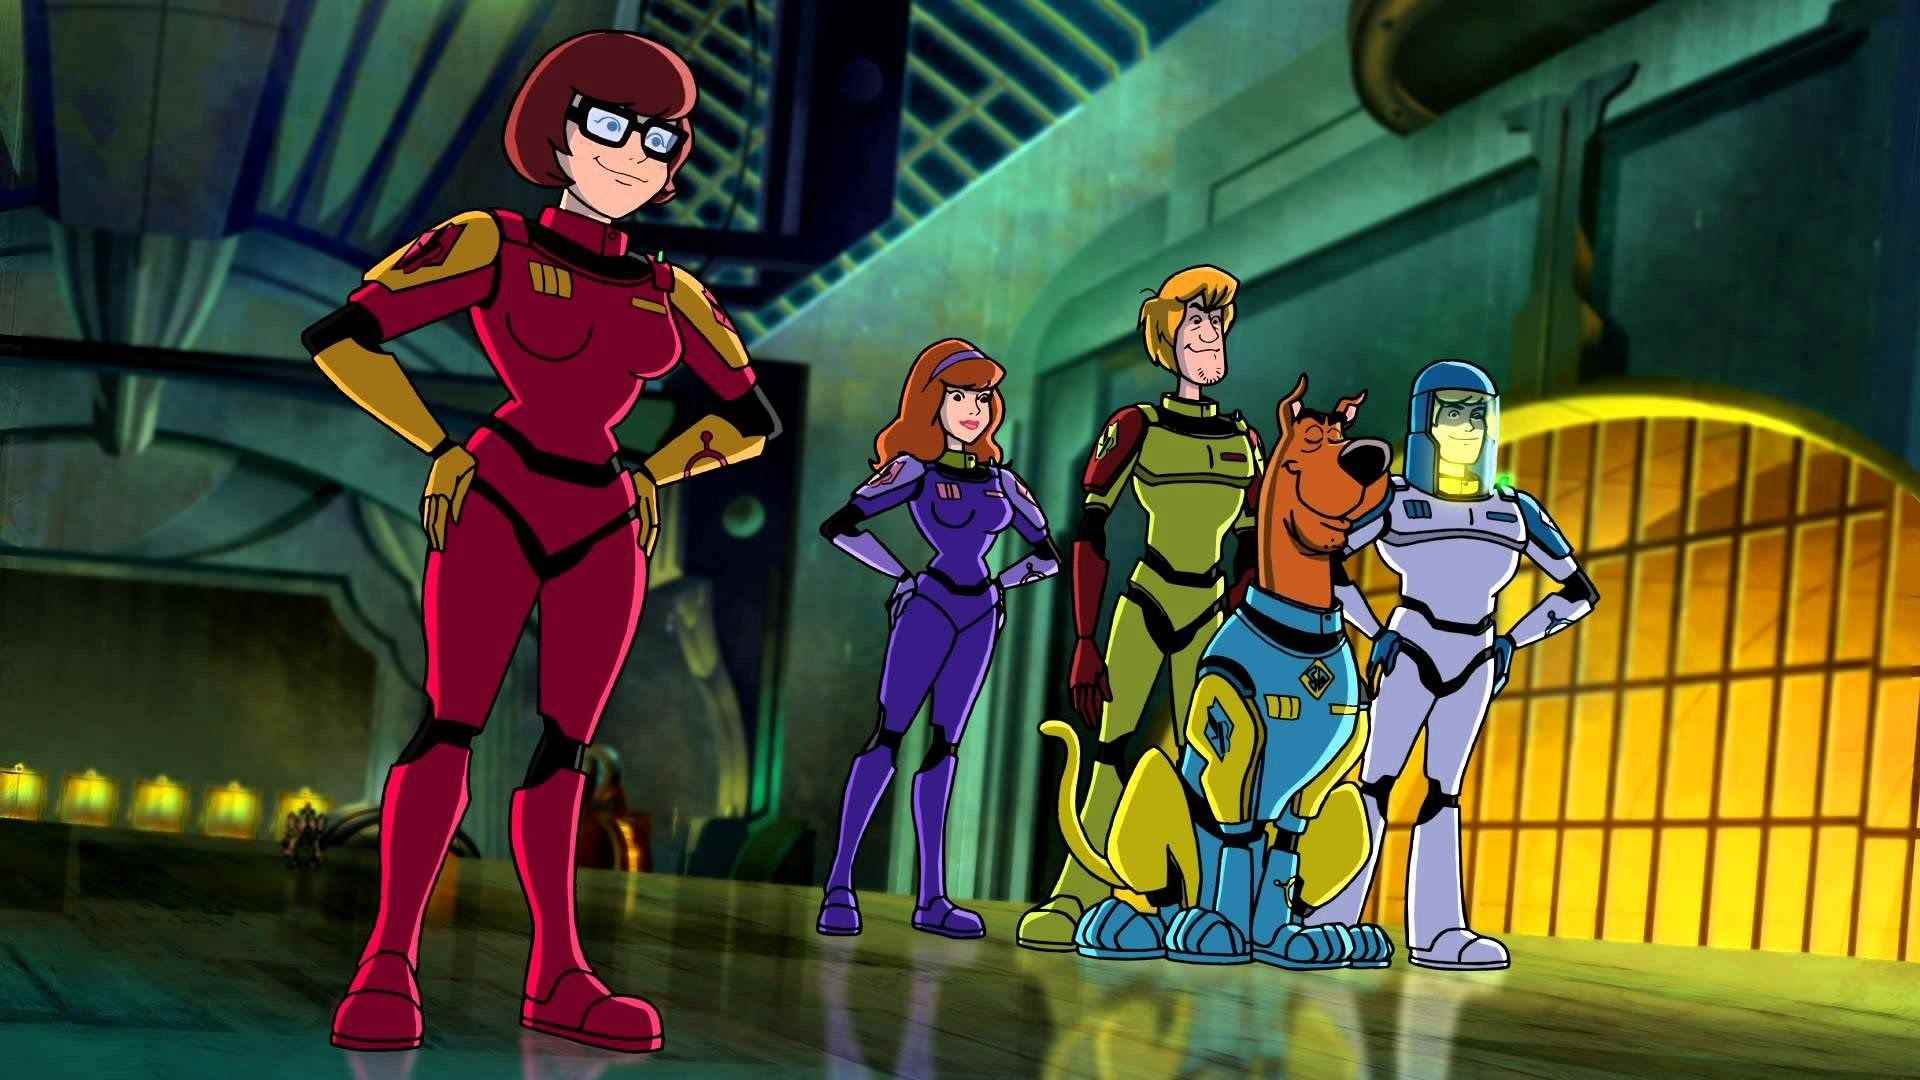
Because this was a space advert, it only made sense to have the person pulling the suitcase to be an astronaut. But I didn’t want to use the generic spaceman suit so I took my inspiration from the Scooby Doo movie, ‘Moon Monster Madness’.
SPACE SUIT INSPIRATION FROM ‘SCOOBY DOO MOON MONSTER MADNESS’
In order to complete my drawing I found an image of a man pulling a suitcase and merged these two images together to create my astronaut pulling the suitcase. And then simply drew the shape of a planet and shaded it in.
I am very happy with this drawing although I didn’t actually end up using this as part of my poster. I swayed more towards a camping style poster as glamping huts look quite futuristic. I may use this idea in the future but I doubt it.
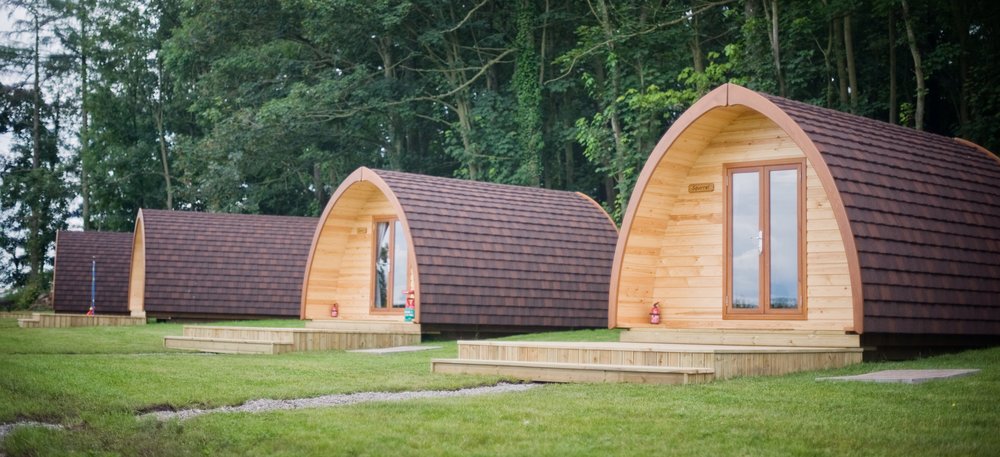
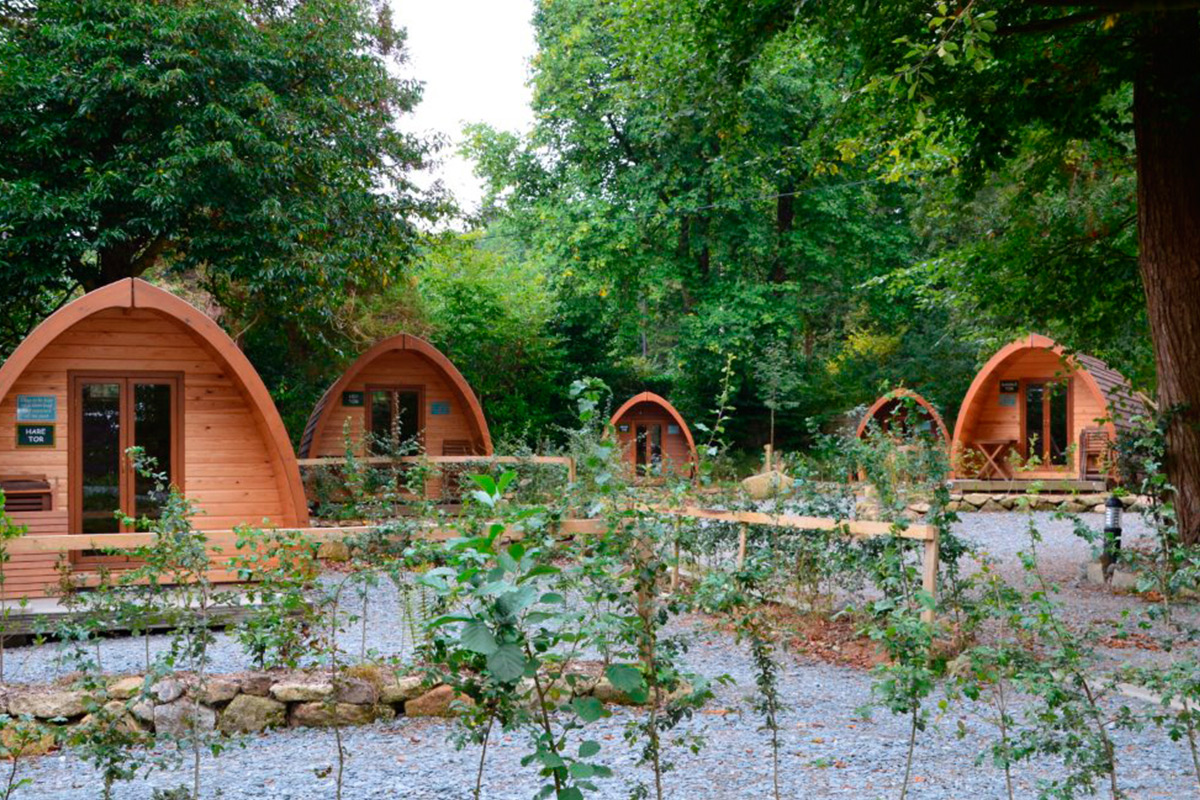
Glamping is pretty much ‘Glamorous Camping’ and describes a style of camping with amenities, and in some cases, resort-style services not usually associated with the traditional camping.
I only chose these glamping huts purely because of the shape and style of them, the shape seems pretty futuristic, and I am happy with how they have ended up looking on my poster.
With inspiration from the NASA tourism posters we had to create our own space tourism poster to a planet of our choice; I didn’t have an initial idea of a planet to visit, I didn’t have an idea of what to do at all.
I looked at some of the NASA posters again and took inspiration from this poster in particular.
I like the dark colours – the blue and the black, together with the red and horizon of a yellow/orange. The tourists are looking over what looks like a lake with a city view in the background, this is the layout I decided to go with.
So I scanned in my water colour image that I did previously into Photoshop and added a dark red gradient to it. I chose this image as the fade of the blue towards the bottom of the paper looks like a light reflection onto water. Using a red gradient on this was intended to create the reflection of the colour of Mars.
I created this gradient by using the quick mask tool to select the background, which decreases the selected area, so when a gradient is added (red) it then fades out with the fading of the image.
I knew I wanted a landscape to be reflected onto the water, at first I considered a city but I thought this would be too generic. I started to consider different ordinary activities and chose clamping, specifically glamping. This is a more glamorous type of camping. I chose this primarily for the camping huts which have a futuristic shape to them.
GLAMPING HUTS
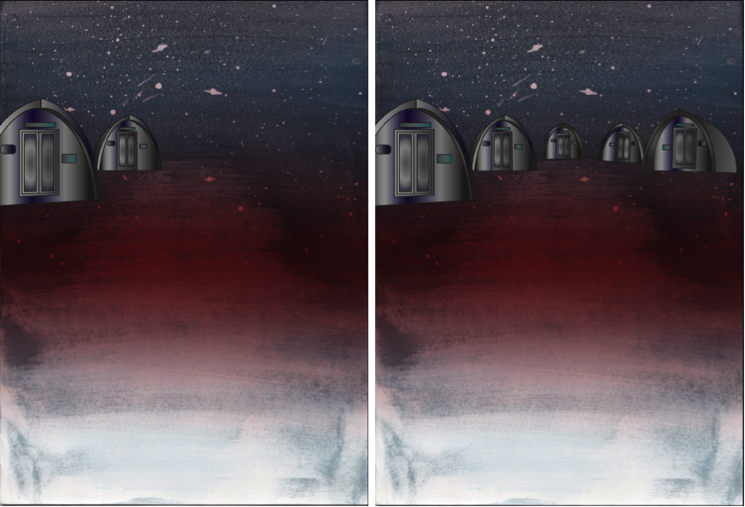
2. I then imported this image into illustrator and used the pen tool to draw around the huts. I used a gradient fill to highlight and dim certain areas.
Once I created each hut, I opened what I had made into photoshop. I duplicated each hut individually, flipped them horizontally and clicked ‘filter’,’distort’ then ‘ripple’ to create the ripple effect of the water. I also changed these additional hut layers to have an overlay effect, this faded out the image to make the colours less distinct, like that of a reflection on the water.
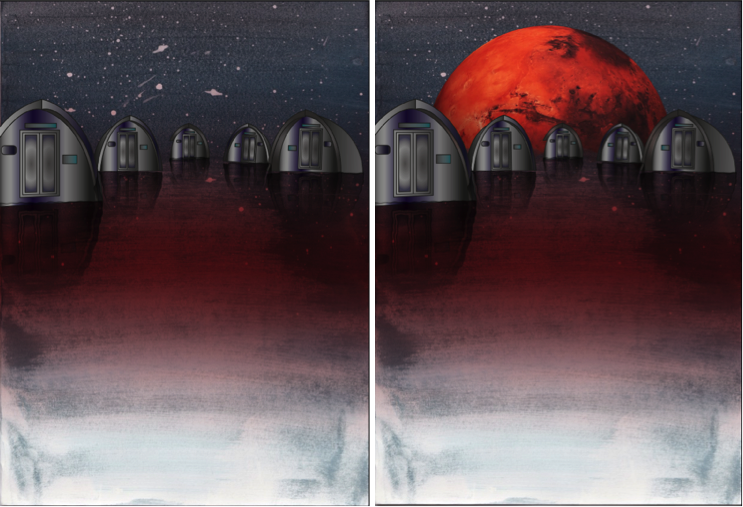
3. I then inserted the red planet into the background so in a sense it is what is creating the red reflection in the ‘water’.
4. Finally, I added text to the bottom of the poster:
‘VISIT THE UNDISCOVERED’
Admittedly I did struggle throughout this process in the aspect of technology being a pain. Sometimes not all of what I created pasted, the gradient wasn’t positioning correctly, shapes would cut in half, a lot of basic things that should’ve worked first time didn’t. This wasn’t a major problem but did however slow down the process as I was increasingly becoming impatient.
The only real problem I faced was with the surface, which the huts are placed on. I tried to create a spherical shape with a planet like texture but this looked odd with the water colour having a water effect. And overall with it looking pretty 2D. The only issue I overcame was with the shape of the planet. By adding the Mars planet in the background, this separated the water part of the background with the sky, which made it more distinct and made it look more natural. I still think it looks slightly 2D, I tried to resolve this by adding the ‘ripple’ effect to the background too, its not too obvious in comparison to without it. The surface would still be pretty flat up close anyway and I think overall, it looks great.
REVIEW: POSTER
I used watercolour and explored ways to create refections – Quickmask, vertical flip and blend modes.
Experimentation with colour and typographical layouts
We wanted to experiment with two different types of art; watercolour painting and digital manipulation. But first we had to create the water colour base for our work.
MY WATERCOLOUR WORK
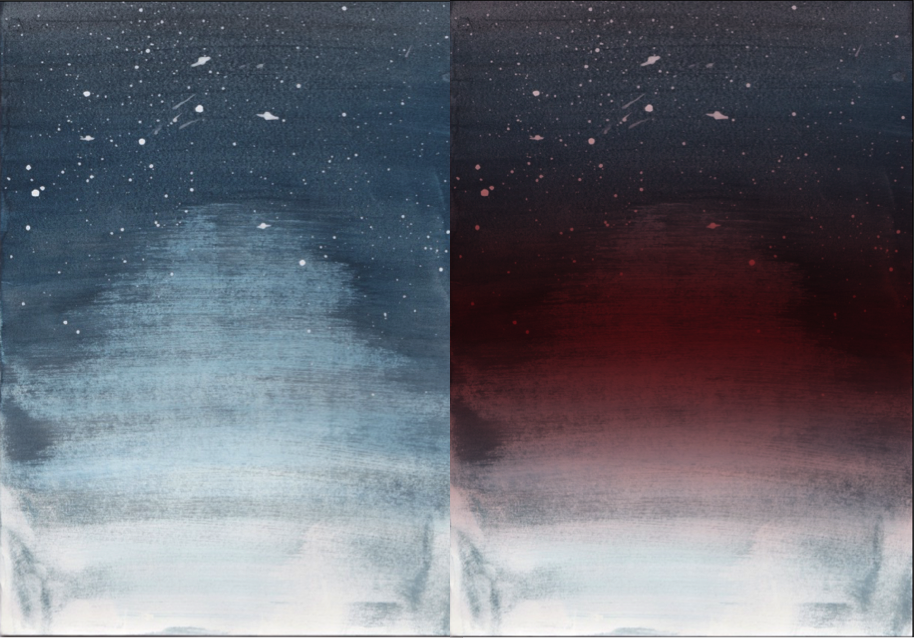
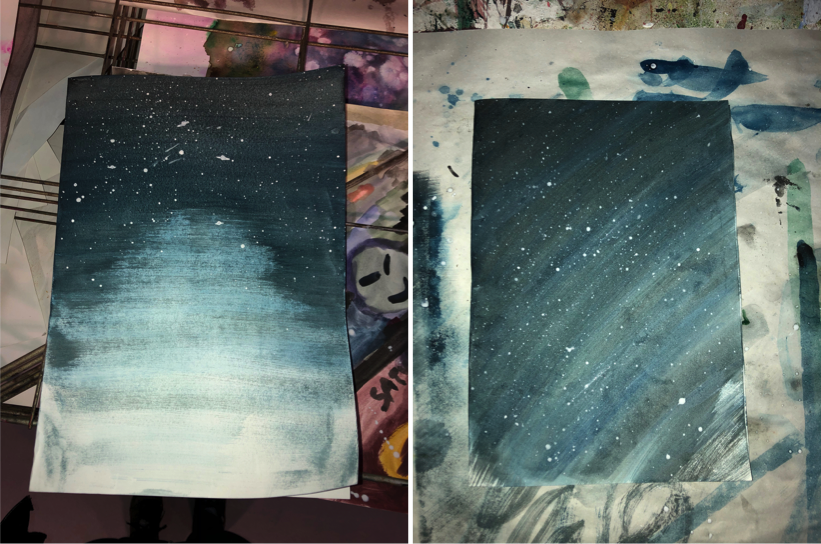
Even though our design was suppose to be more of a watercolour galaxy piece, I attempted to do this 4/5 times but I wasn’t happy with how these turned out. So I went with the aim of creating a sky background. I used the same process for both of these pieces:
1.I spread a thick layer of water over the paper to start with.
2.I then soaked my paintbrush and put paint on it and squeezed this onto a pallet so it was more of an ink. By doing this I can used a wider dry paintbrush and spread the ink over the paper which will gradually fade as the paint runs out.
3.I started at the top of my page with a blue and went over this about 10 times to make the top darker than the bottom to create a gradient effect. I then mixed the blue with a bit of black and went over it a few more times and then iI just used black by itself.
It was purely by coincidence that my first piece faded in the centre of it, creating a gradient effect but something that you’d see on a lake view. I was very pleased with how this turned out as I think the colours and the gradient effect will look great on my poster, especially when the image is manipulated.
I started from a corner with my second image, I think this would work best with a planet in the bottom right corner. This is at it kind of has a roundish effect which would fit well with the shape of the planet.
Overall I am extremely happy with how these both turned out and I am looking forward to what I can create with them once I have scanned them in onto the computer.
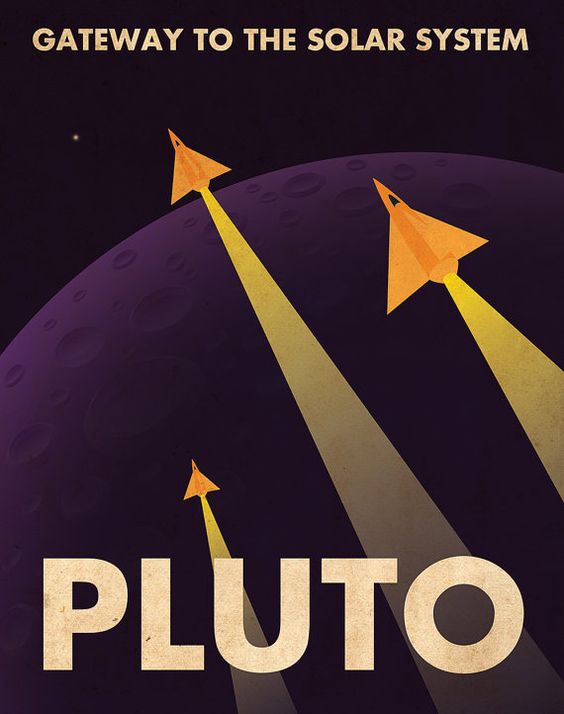
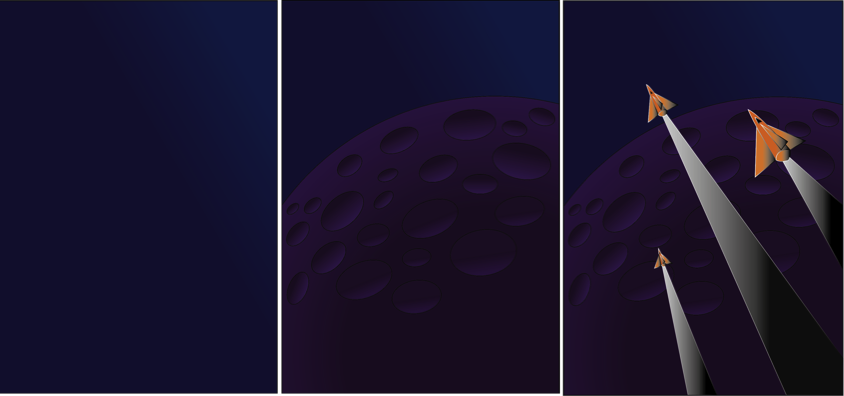
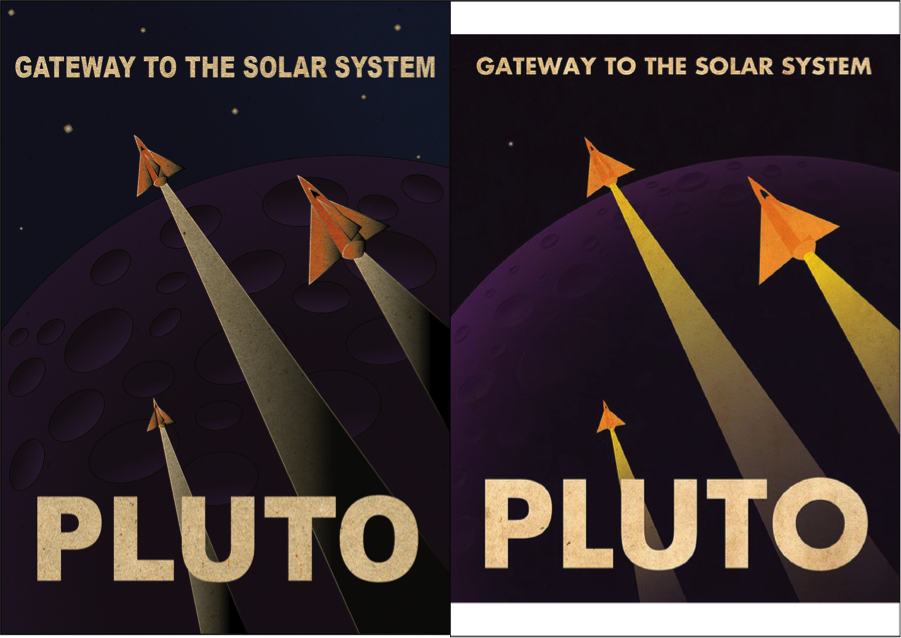
1- I started off by opening a new A4 page and placing the original Pluto poster, and locking this layer, this is so we can use the pen tool to trace around each shape. I then created a second layer which would be the background, I used a dark to light blue gradient to do this as it would be the sky in the final outcome.
2. I then added a third layer in which I used the shape tool to create a circle which would be Pluto. I used a gradient of Dark purple to light purple for this to create the effect of light on the planet. I then created ovals using the shape tool and used the gradient of black to purple to create the 3D effect of the crater.
3. For the rocket, fins and after-burn, I used the pen tool to outline these shapes and then filled the rocket with an orange and black gradient, and the after-burn with a white and black gradient.
STEP 4 – 6
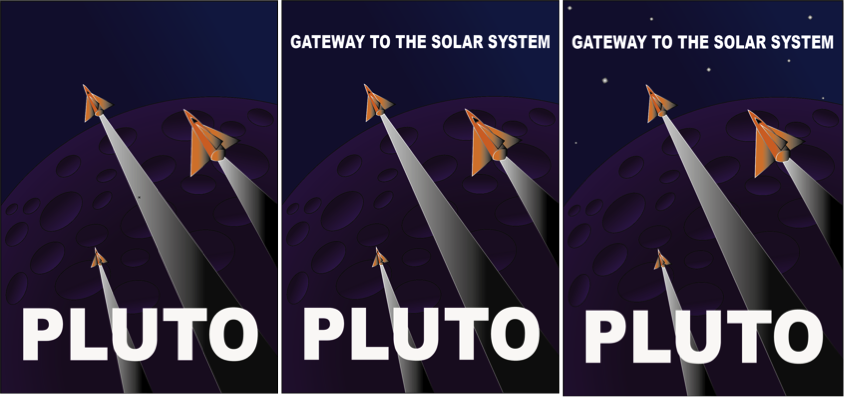
4. I then inserted the text ‘PLUTO’ and changed the font to Arial Black and made this bold. I then sized this to a similar size to the original.
5. I did the same with the ‘GATEWAY TO THE SOLAR SYSTEM’ .
6. I inserted little square shaped and rotated these slightly, these were filled with a black to white gradient.
FINAL PIECE IN COMPARISON TO ORIGINAL
Finally I inserted a layer to give the poster an old effect. I wanted to make it look rustic and this did the job perfectly.
I am very happy with how this turned out as it looks very alike to the original. The only thing I would like to improve would be the planet. Even though I am very impressed with what I did, I think the shading and effects on the original bring out the planet more as a 3D one than mine does. But for my first try I think i did extremely well.
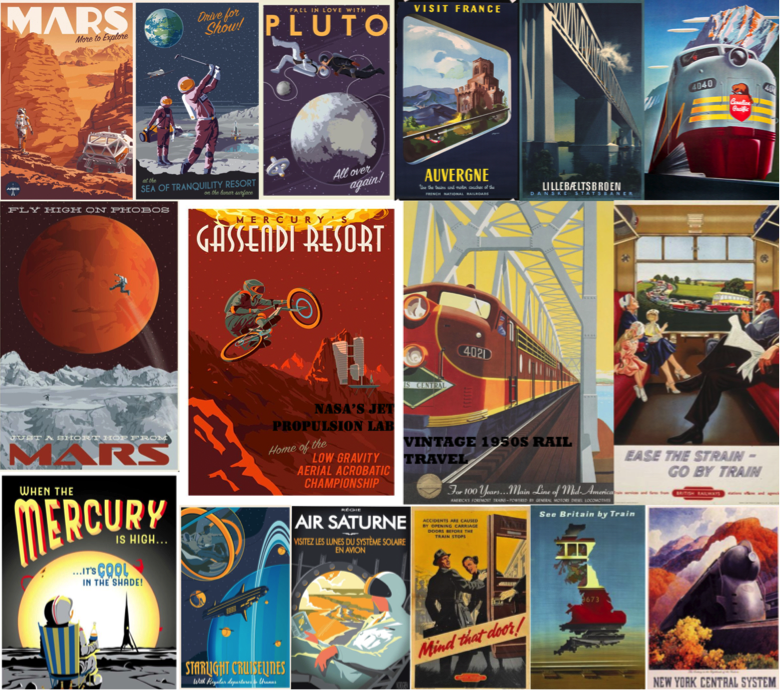
NASA’s Jet Propulsion Laboratory staff have created posters advertising tourism to exoplanets, the the romantic style of 1930’s-era railway posters. This is to get people excited about space science and to build their curiosity. It was suggested to give a similar vintage treatment to amazing destinations in the solar system that JPL are currently exploring .
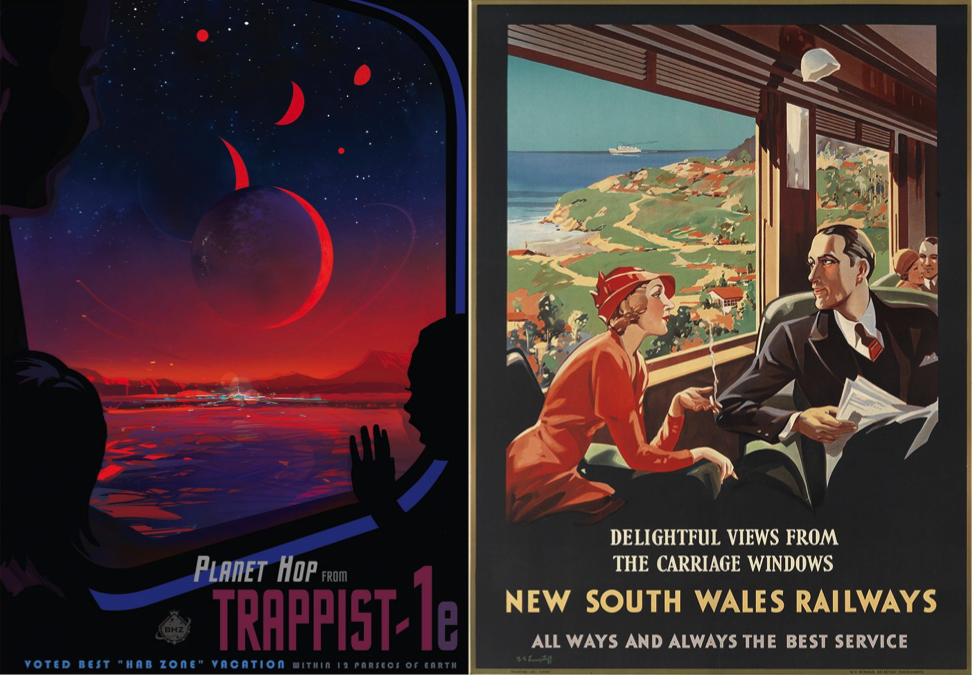
COMPARISON BETWEEN NASA’S JPL POSTER AND A 1930’s RAIL POSTER
This is a visual comparison between a NASA poster and an original 1930’s poster. The situation on both are very similar as they show a scene while travelling, I particularly wanted to find images like these to show distinct differences rather than just the situational ones. The vintage poster has only slightly ben reconstructed for contemporary purposes by NASA. The style is very much the same but the colours and effects are more realistic due to the advancement in technology we have now compared to the 1900’s.
We used these posters to influence our posters as they have basic solid colours which look very attractive and not tacky.
‘The old WPA posters did a really great job delivering a feeling about a far-off destination. They were created at a time when colour photography was not very advanced, in order to capture the beauty of the national parks from a human perspective. These posters show places in our solar system (and beyond) that likewise haven’t been photographed on a human scale yet — or in the case of the exoplanets might never be, at least not for a long time. It seemed a perfect way to help people imagine these strange, new worlds.’
DAVID DELGADO
RETRO FUTURE STYLES – FILMS
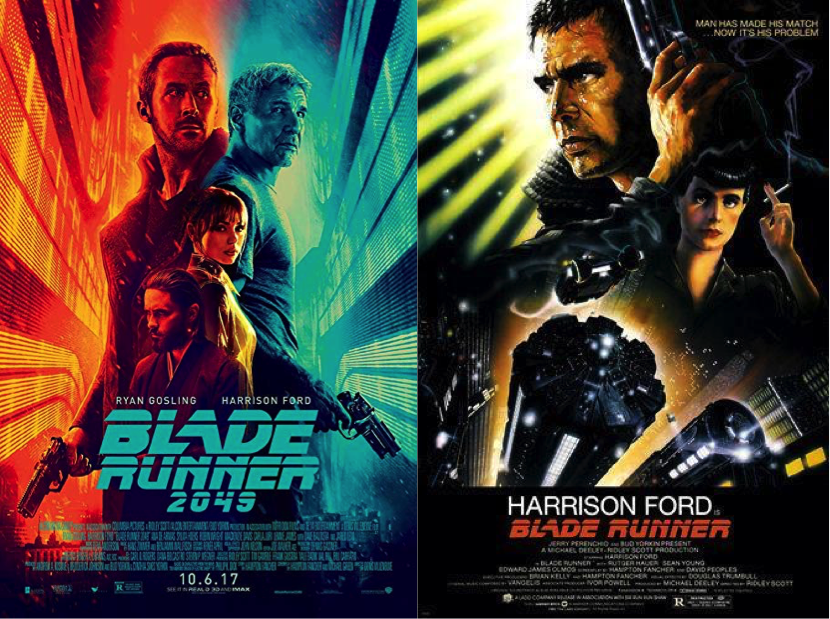
BLADE RUNNER 2049 AND BLADE RUNNER 1 POSTERS
“I was mesmerised by the mix of what was then futuristic with what was already retro, that is what makes Blade Runner the gold standard (among) sci-fi dystopian worlds, as it’s believable. Because we do not live in a world where everything is from today … We live in a chaotic world of various decades of architecture, automotive design and fashion, combining and colliding all (in) that same moment.”
JEREMY SCOTT
In Los Angeles, 2019, Deckard is a Blade Runner, a cop who specialises in terminating replicants. He is forced to come out of retirement when four replicants escape from an off-world colony and come to Earth.
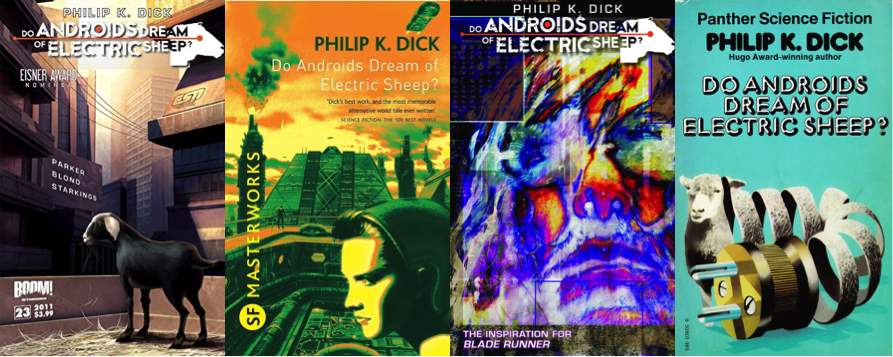
Blade Runner takes inspiration from space travel. The film envisions the future in the year 2019 as bleak, this contrasts with other depictions of the future in film and TV. Blade Runner is famously and loosely based on Philip K. Dick’s ‘Do Androids Dream of Electric Sheep.
PHILIP K. DICK’S ‘DO ANDROIDS DREAM OF ELECTRIC SHEEP’
Deckard, a bounty hunter, plans to kill enough replicant androids so he can replace his robotic sheep with a real one. In the process he falls in love with an android and learns about himself and what it means to be human and inhuman.
Blade Runner fits into two cinema genres; one science fiction, and the other noir.
NOIR – Is a term used to primarily describe stylish Hollywood crime dramas, particularly those that emphasise cynical attitudes and sexual motivations.
INFLUENCE
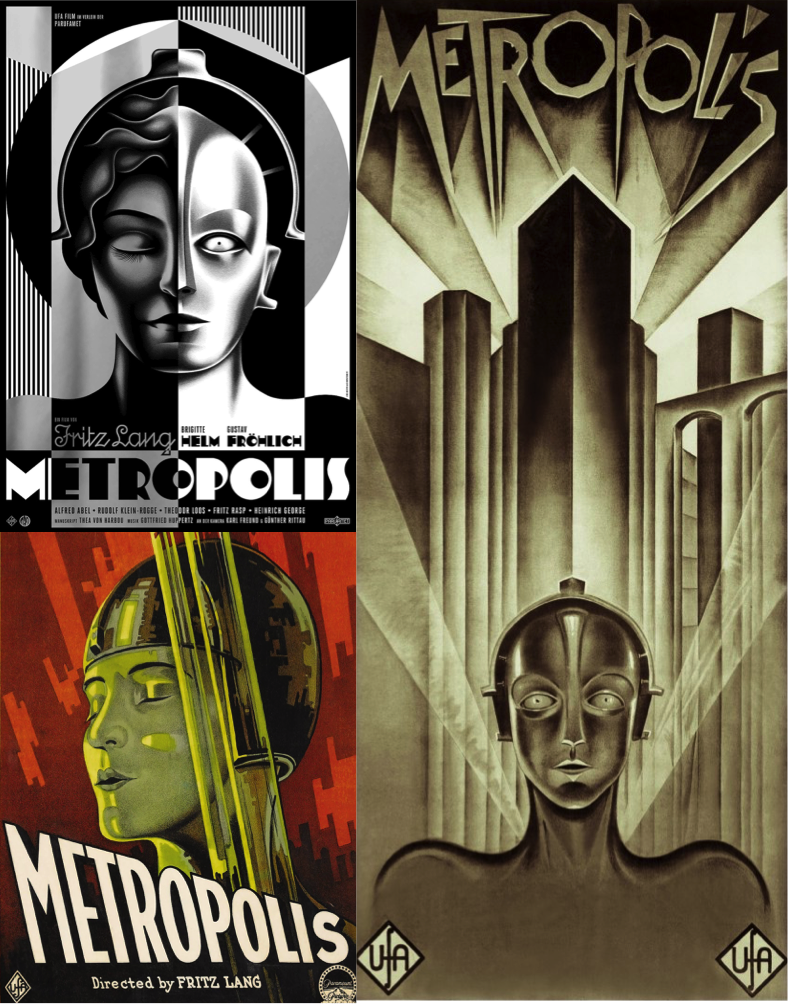
METROPOLIS POSTERS
In iconic films like these, the advertising is very important and needs to represent the film itself; theme included. The retro futuristic styles express their themes perfectly – SCI-FI
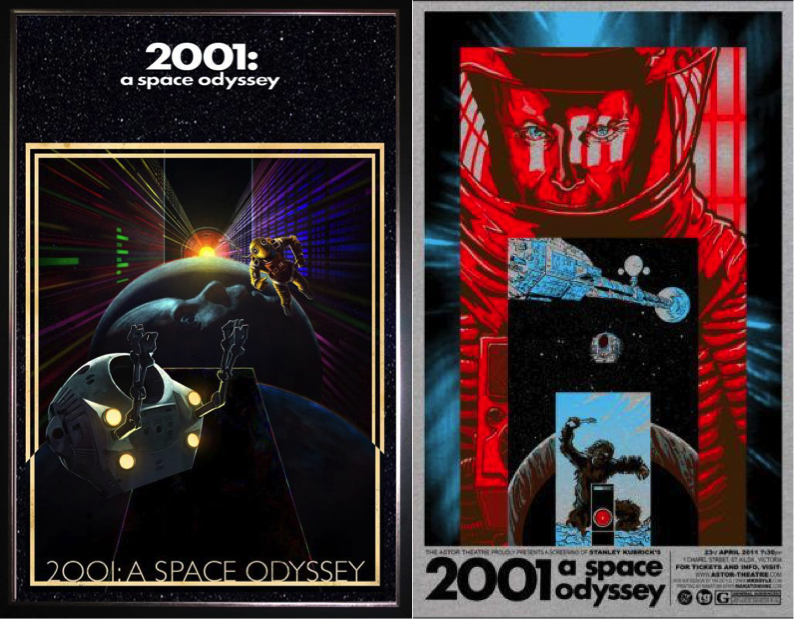
2001 A SPACE ODYESSEY POSTERS
The movies didn’t actually influence our movie at all, it was more of the generalisation of movies where they have a deep voiced man narrating at the start of the movie which influenced our movie. However the JPL posters did influence our poster as we wanted to make it retro.
INSPIRATION
NASA JPL POSTERS
I particularly like the layout of these, the perspectives and retro effects of these posters is something I want to incorporate into my own poster. I want to make my poster look vintage as it looks detailed and modern yet retro.
VERTIGO COVER
The Vertigo poster is probably my favourite poster. I like the contrast in the bright sky to the darkness of the surroundings. The perspective of the poster is also something I like, it makes the scenery seem intimidating, which new surroundings can be. The shading and colours of the poster is also similar to that of the NASA posters and the vintage rail posters.
I also drew an idea for an activity which would be on my poster, I took inspiration from activities you would usually do while on vacation. (DRAWING)